Wednesday, December 14, 2016

Reference Tweak Alert: Bybee Active Room Neutralizers

A single Bybee Active Room Neutralizer (ARN)

Does Jack B. Sleep?

It would seem that he doesn't. Perhaps, like our president-elect, he survives on very little sleep. All I know is with the prodigious amount of tweaks that he produces, he can't have much time for sleep. For every one tweak that actually makes it to market, dozens are tested and tossed. Jack has been developing cutting edge, often controversial (to those who never hear his products, but authoritatively pontificate on forums) tweaks longer than I have been the Tweek Geek.  I met him in 2000 and was "converted" when I tried a set of his Purifiers on my Legacy Audio speakers. I remember the moment. It was jaw-droppingly good sound like I had never experienced before. I had good equipment, B&K, Legacy audio, Kimber Kable, but the Bybee Purifiers were the icing on the cake. I was so excited about them I had to tell everyone, so on to the forums I went. Wow, that was another experience I won't forget, but don't care to discuss because it's irrelevant, and Jason Victor Serinus' most recent Stereophile article covers the topic in a positive, very well worded way.

The Active Room Neutralizer

The Active Room Neutralizer (ARN) is a white rectangular shape about 2" wide, by 6" long and 1/2" thick. A thin, 10 foot long white AC cord  eminates from the bottom and is terminated with pretty standard 2 prong AC plug. Inside the plastic cover is a proprietary blend of materials that when activated by AC, resonate with the air molecules in the room, enabling the transmission of sound without the usual time misalignment of frequencies. They work well with other room treatments such as the Steinmusic Harmonizers, Shakti Hallographs and Stillpoints Apertures.

The instructions say to attach them to a wall with blu-tak or similar adhesive. They need to be around 5 feet off of the ground. Where you place them in your listening room depends on how many you have. Experimentation is always key. 

Break in is also key. Although you will hear something almost immediately, they will continue to improve over several days. Give them at least 48 hours of being installed and plugged in before evaluating, and another 48 before rendering judgement.
ARN Installed on a wall using blu-tak.

Listening

I knew it would take awhile for the ARN's to acclimate/break in to the new listening space, so I unboxed them the afternoon they arrived, plugged one into the wall behind the speakers, and the other into a position behind my listening seat. Being the holidays, there were plenty of activities to occupy me for the next 48 hours, so it was easy not to "peek" at the results.

Two days later, we came home late from one of our holiday activities, and I went downstairs to unwind a bit while listening to some music. Unwind I did. So much so I fell asleep! Usually a good sign that the system was not suffering any ill effects from the newly installed tweaks. Alas, the critical listening would have to wait until tomorrow morning. 

With the next morning, I headed to the listening room, with coffee, pad, and pen. Below are a few tracks I listened to while evaluating the ARN's.

Patrick O'Hearn, I Could Live Here - Slow Time: This opens up with some bongo drums lightly played in an acoustically ambiant space, with a backing synth track. It's good for checking soundstage. A piano starts playing single keys, adding to the sense of ambiance. About 2 minutes into the track the bass line comes in low, giving a great feeling for bass depth of the system. The tune swirls around the room, behind the listener and enveloping one in the space of the recording. With the Active Room Neutralizers in the system, I forgot about the room I was listening in, and felt transported to the actual venue. I had also picked up on some small details within the track. Synth lines that floated around the room, very low level but more noticeable with the ARN in place. This was a familiar effect that occured over most recordings.

Jennifer Warnes, Ballad of the Runaway Horse, (Unknown version): This opens up with an acoustic bass and jennifer's vocals in an ambient space. I listen to the acoustic bass for the artist's fingers plucking the strings, for the tone of the instrument, and for the sense of space it resides in. I look for the naturalness of tone and texture in the bass and Jennifer's voice. I look for the layering in the vocal harmonies by the accompanying singers. There is also some interesting playing by a cello in the background at a very low level. Only a very resolving system can get every nuance of the cello. With the ARN's in place I felt like I was in the recording space, not my room. There was a sense of naturalness that lent to a very realistic portrayal of the bass, cello and voices. The low level information was more evident than without the ARN's in place, the tone and textures were simply amazing. The best I have heard my system sound.

Trentmoeller, Evil Dub, The Last Resort: Recorded in Q Sound, it offers up a huge, wrap-around 3-Dimensional sound on a well set up system. The bass is deep, pulsing and nuanced. Believe it or not, the little bleeps and blips on the song can either sound flat, or have a bit of decay on them, depending on the resolution of your system. With the ARN's in place the decay was clear, as were many other fine details in the mix.

Stop Swimming, Porcupine Tree, Porcupine Tree: A Haunting, sad song that is fairly well recorded. The song opens with drums that are dynamic with a sense of space around them. It continues with piano, solo vocals synth and a bit of orchestral backup. It draws you in, and relaxes you at the same time.
ARN peeking out from behind a Stillpoints Aperture

Tradeoffs?

I have heard tweaks that produce a holographic effect at the expense of losing image focus, this is not one of those tweaks. It creates a huge sense of width, depth and holography without the loss of image focus. I can literally find no tradeoffs with the Active Room Neutralizers. At least for my sonic tastes and in my system. Everything is clearer, more natural, more spacious with microdynamics, textures and low level resolution.

Conclusion

This relatively simple looking device has rocked my world, and being the "Tweek Geek" that is saying quite a lot. I am surrounded by tweaks and have been for nearly 14 years now. For at least 7 of those 14 years, the Stein Harmonizer system has been my absolute reference, desert island (provided there is AC) tweak. Whenever a new customer would ask "what is the best tweak you offer" I always replied "Hands down, the Stein Harmonizer system". Now I have to qualify statement in light of the stellar performance of the Active Room Neutralizers. If you don't have a minimum of $2k to plunk down on a Stein Harmonizer system, the Active Room Neutralizers are absolutely the best tweak I have to offer and have heaard in quite some time.


Sunday, December 11, 2016

Wireworld Hits A Home Run With Cat 8 Ethernet


I've never really heard a sonic difference in Ethernet cable. That being said, my experiments with ethernet cables has been using only what came packaged with products, having some made up off of a spool of Cat5 or 6, and buying some inexpensive ethernet cables from the local megamart. I've wrapped them in Stillpoints ERS, used Shakti On-Lines, still no audible differences.

I recently received a shipment of Wireworld's new Starlight Cat 8 ethernet cable and decided to give it a try in a few key places within my network.

CAT7 vs. CAT 8

Starlight Ethernet is the first production cable that meets the proposed requirements for Category 8 networks. The proposed standard for Category 8 networks will extend speeds to the staggering rate of 40 Gigabits per second.

The current standard is CAT7. Category 7 cabling was created to satisfy the demands of 10 Gigabit Ethernet. Even though most media networks now run below that speed, cables that support higher speeds have been found to improve the quality of audio and video streaming.

One of the reasons why CAT7 cables do not meet the proposed CAT8 specifications is that they allow too much crosstalk (mixing) between the four signal channels. To control crosstalk, conventional CAT7 cables use four twisted pairs of conductors with one foil shield on each pair. An overall two-layer shield reduces outside  interference. The problem with twisting is that it makes lengths of the conductors uneven, which causes timing errors called skew.

To support the higher data rate transfer speeds of CAT8 the Starlight 8 ethernet cable incorporates Wireworld’s patent-pending Tite-Shield™ Technology. Wireworld's Tite-Shield technology isolates the four channels with a three-layer shield on each conductor pair. Those shields are so effective that twisting is no longer needed and conductor length differences are eliminated.

Starlight’s unique flat design provides greater physical separation between the four conductor pairs to provide lower crosstalk, supporting higher transmission speeds than conventional designs. The cable also utilizes Wireworld’s proprietary Composilex® 2 insulation to minimize triboelectric noise. The refined transmission properties afforded by these technologies ensure uncompromised performance in the next generation of streaming applications.

Why Do Ethernet Cables Matter In Streaming Audio?

A fantastic question, and one that I have been asking for awhile. Many argue that ethernet cables cannot possibly make a difference, and they are half correct. If using what is called TCP (Transmission Control Protocol) for sending data over a network, then it is very difficult for an ethernet cable to make a difference because the packets of information sent via TCP are guaranteed to be received in order. TCP is all about this reliability — packets sent with TCP are tracked so no data is lost or corrupted in transit. Unfortunately, audio streaming to your DAC or streamer is not sent this way. It is sent via UDP.

UDP stands for User Datagram Protocol. This is how streaming audio and video are sent. — a datagram is the same thing as a packet of information. The UDP protocol works similarly to TCP, but it throws all of the error-checking out in favor of speed. All the back-and-forth communication and deliverability guarantees of TCP slow things down.

When using UDP, packets are just sent to the recipient. The sender won’t wait to make sure the recipient received the packet — it will just continue sending the next series of packets. If you’re the recipient (streamer) and you miss some UDP packets, too bad — you can’t ask for those packets again.

If you experience just a minor packet-loss, the video or audio may be distorted for a moment as the video continues to play without the missing data. We've all seen what poor UDP does to a video signal. That's what it can do to your audio signal as well.

Now that we have all of that out of the way, let's get to the review.

My Network

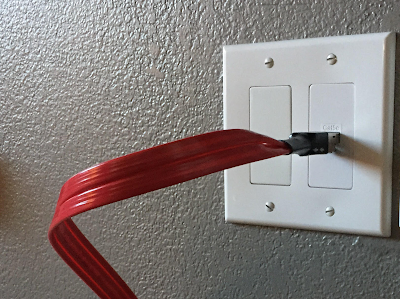
Currently, the modem that connects to the internet resides upstairs in the opposite corner of the house from my listening room. There is a long run of Cat 7 ethernet connecting the modem directly to a switch in my basement workshop. From that switch, I run an ethernet cable to a wall jack which is then connected to another wall jack in my listening room. It's a 15-20 foot run. From the wall jack in my listening room another ethernet cable connects directly to my AURALiC Aries streamer. A more visual representation looks like this:

Cable modem ----> Switch in the basement ----> Wall jack in shop ---> Wall plate in listening room ----> Streamer

I was able to put the Wireworld cable in two locations, so it looked like this:

Cable modem ----> Switch in the basement >>CAT 8>> Wall jack in shop ---> Wall plate in listening room >>CAT 8>> Streamer

Before we get to the listening and results, let's take a look at why ethernet cables matter when streaming audio.

Listening

With the Wireworld Cat 8 cables in place, I began to listen to some familiar tracks.

Track 1 - Ballad of the Runaway Horse, Jennifer Warnes
The vocal textures were more lifelike, and the plucking of the string bass had more....Pluck. I would call it microdynamics.

Track 2 - Roadhouses & Automobiles, Chris Jones
Chris has a big voice, and the vocal textures with the Wireworld in place were deeper, which lent itself to a better sense of realism. The subtle sounds of crickets in the background were a little more noticeable, and the decay/reverb on the background singers seemed to hang in the air a little longer.

Track 3 - Trentmoller - Evil Dub
I use this track to listen for low bass reach, as well as the 3 dimensionality and high frequency smoothness/deliniation. The album is actually recorded in Q-Sound, and has some very interesting 3D effects if your speakers are set up properly. The sounds can quite literally be projected from behind you. The bass was strong and the tings, pops and other effects were very 3d with good attack. About 1:15 into the song the symbols come in quickly. I listen for speed, emphasis, and attack. Most of the time the attack can sound spitty when done wrong. The highs here remained smooth, fast and with good microdynamics.

Track 4 - Muddy Waters - My Home Is In The Delta
A great demo track. Despite the simplicity of the recording, there is a lot going on here, and a lot to listen for. The Subtle movements on the guitar for one, the incredible dynamics of Muddy's voice captured on the recording, and the ambience/reverb. Listening at moderate levels can be immersive, and it was with the Wireworld Cat8 in place. Again reverb and decay seemed to hang in the air longer and ambient cues were abundant.

Overall, two things were immediately apparent. The possible lowering of the noise floor and lower distortion in the high frequencies. What I mean by that is that I heard more low level information. Air, space and texture seemed to improve and be more realistic. The highs were more defined, delineated but withought being exaggerated or brought to the forefront of the musical presentation. It sounded cleaner, and clearer.

Upon further listening, my previous impressions were confirmed. Regarding texture for instance, an acoustic guitar had a more wooden tone to it. When fingers strummed strings, and glided acrossed frets is was more like the live sound of hearing fingers strumming strings and moving up and down the neck of the guitar. The same went for double bass. Vocals also had more emotion due to hearing more of the microinflection. The enunciation of lyrics was clearer as well.

Conclusion

The Wireworld Starlight Cat 8 ethernet cable is a relatively inexpensive and effective way to help lower noise and distortion your streaming audio. Whether it be from your own music library or from the internet, you simply get more information with the Starlight ethernet cable in place. Even if you cannot do an end to end run of Starlight ethernet, every little bit seemed to help. In my system I was able to replace 2 runs of standard issue Cat5 and it made a significant difference.

I give it 3.5 tinfoil hats!


Friday, November 4, 2016

Learning More About The Equi=Core


I and some audiophile colleagues have been experimenting a bit more with the Equi=Core balanced power transformers in a power cord and have a few new insights. The Equi=Core is one of the best values in a power product we have come across in quite some time. I personally use an Equi=Core 300 on my AURALiC Vega with amazing results.

1. Plug it straight into the wall - I've tried it plugged in to a few power conditioners vs. straight into the wall. The Equi=Core prefers the wall.

2. The most cost Effective tweak may be to just swap out the ends - We have been experimenting with a few different terminations and rhodium plated copper ends that we use to terminate our power cords seem to offer a smoother high frequency response than the stock ends.
These Ends work very well with the Equi=Core. Offering a nice
improvement to the already excellent sound. Email us for more info.

3. You HAVE to put one on your music server/Audio PC/NAS - Aside from the DAC, this is a most significant improvement. It significantly lowers the noise floor, providing for a deeper soundstage and more detail coming through. We use an Equi=Core 300 on a power strip that feeds balanced AC to our server, external hard drive, and router.

We haven't found a better performing power product near this price point. If you are shopping for a power cord, power strip, or conditioner you absolutely need to try an Equi=Core before buying anything else. 

Friday, October 14, 2016

Holy Sh*t Moments #3: Enhancing the Copper

If you've been following my blog or my web site for any length of time, you know that my all-time favorite tweak is the Stein Harmonizer system. It psychoacoustically expands the boundaries of one's listening environment (the room and space sound bigger than they are), creates silky smooth mid & high frequencies, and reveals subtle textures and information like nothing else I have used to date.
A Stein Harmonizer - Still my favorite tweak.
It's also really expensive to do properly. You need at least 2 Harmonizers, then there are the Blue Diamonds to place atop the speakers, and the blue suns to disperse about your room that adds even more to the effect. It's amazing when implemented properly.

An Opportunity To Experiment

I had lent out my Harmonizer system in late September, and it would not be returning until right before RMAF. I missed them terribly while they were gone, but it also gave me a chance to experiment with my other tweaks, trying to recreate the effect of the Harmonizer system I had lent out.

The net result of the absence of the Harmonizers was the DIY tweak consisting of .1875" and .3125" copper rods along with copper cups was proving to have a mind bogglingly good effect on the system. Similar to the Stein in that it made the room appear larger sonically, also enhancing dynamics and resolution. It was not as powerful as the Stein, but still pretty darn good on its own.

I didn't have a whole lot of time to see how the copper interacted with my other room tweaks with RMAF approaching, as I had removed all other tweaks from the room and had them packed away. But that would allow me to do one of my favorite things once I returned from the show to a "tweakless" room. 

Starting With A Clean Slate

I like removing all of my tweaks and disassembling my system every few months, it serves as a sanity check (along with having a group of audiophile friends whos ears I borrow once in awhile). I get to re-introduce tweaks one at a time to asses their effect, and synergy with the other tweaks.

So, returning from RMAF with copper "sculptures", copper cups, Bybee QP's, and the Stein Harmonizer system, and some other tweaks that were lent to me by my friends at Stillpoints (more on that later), I began re-introducing the tweaks.

The Experiment

Starting with the Copper cups and sculptures. I ended up with 2 .1875" rods centered in front of me, 2 .1875" rods off to the left and right of my listening chair, and 1 of the larger .3125" rods behind me. This had a pleasant, warm and rich tone with, nice dynamics a fairly holographic soundstage. Nice but not the Steins.

Stillpoints Ultra 6 under the AcousticImagery Jay-Sho preamp
I had several Stillpoints Ultra 5's and Ultra 6's to experiment with as well as a new active grounding conditioner from Telos. The short story here was the Ultra 5's and 6's shocked me with the improvement in high frequency clarity, transient attack and dynamics they allowed my system to reproduce with such ease. The Telos worked in addition to the Entreq ground boxes I had in place already. Further reducing the noise floor by creating an active reference ground. More detail without becoming sterile.
Stillpoints Ultra 5 under speakers - Whoa...

My system was starting to get to a very good place, with focused imaging, incredible dynamics, and a pretty wide soundstage. If I had never had the Harmonizer system, I would be very happy, but I knew I could achieve more..
Copper rods in stand, 2 copper cups.
The next introduction would take more time. It was re-introducing the Bybee Quantum Plugs. This has to be done over time because the Quantum Plugs need to charge, or settle in. It takes a day or two. I started with two at the back of the room. It's a long room and they were roughly 20' from my listening chair. I let them settle in overnight and came in to listen the next morning. This was a subtle, but pleasant improvement in the wrap around effect the soundstage was producing. I was getting more ambient information, decays were longer, and the immersion into the soundstage was more pronounced.  Moving forward cautiously, I only added 1 Quantum Plug. I placed it as close to the center along the wall behind the speakers as I could. 
.3125" copper rod. I hit this with a torch
to get the colorful look.
The next morning, the front to back, as well as side to side aspects of the soundstage really began to fill in. This was about 80% of the Harmonizer system's effects, especially when implementing the large 12 oz copper cups in the center behind the speakers as well. The speakers had disappeared, leaving a wrap around soundstage, with focused imaging and fantastic dynamics. If I had never heard the Harmonizer system, I could stop there and be extremely happy.
A Bybee Quantum Plug.
So there you have it. My "Poor Man's Harmonizer System". It consists of the following:
  • 6 .1875" copper rods, placed in 18" long 4" x 4" boards that I had sanded and finished.
  • 1 .3125" copper rod in a finished wooden board like above.
  • 3 Bybee Quantum Plugs - You may only need 2, depending on the size of your room.
  • 2 large 12 oz Sertodo copper cups.
  • 2 small 2 oz Sertodo copper shot glasses.
This will get you 80% or so of the effect of the Stein system, and cost under $600. 

Some things to note

  1. More is not necessarily better - Too much copper, or too many QP's and the sound gets a little artificial. Move slowly, take your time. Start with the copper first, then start adding QP's.
  2. Placement of the QP's does not have to be exact. The front and back of the room placement is more important than being placed exactly at the center of the wall they are plugged in to. If you are concerned about this at all, buy a 3 prong extension cord for the QP. Then you can place it precisely. 
  3. The copper rods work best near a wall. These too do not necessitate exact placement. If you have a choice between placing them exactly but far from a wall or slightly off but near a wall, near a wall is the way to go.
  4. If you have a Harmonizer system already, don't sell it!  The rods and the QP's will work with the Harmonizer products really well. Think of it as having more tools to treat your room. I use 2 Harmonizers, 2 blue Diamonds, and 3 Blue Suns along with the copper and QP's.  I found this to provide the best blend of dynamics, texture, tone and resolution.


Tuesday, October 11, 2016

Holy Sh*t Moments: Part 2 - The $75 DIY Tweak That Will Blow Your Mind.

I don't understand why the following DIY tweak/project does what it does. But it is effective and if you take the time to make and place the items I am discussing, you will find your music to be more enveloping, engaging, dynamic and satisfying.

My motivation for telling you this? Nothing other than I want you to experience the amazing benefit of this DIY project. I make nothing off of this.

A Serindipitous Discovery

This all came about when a customer of mine called and relayed a story to me. He was telling me about a day when he was listening to his audio system. His wife had acquired an antique copper kettle, and proceeded to put it on a shelf behind him in his listening room. It changed the sound in a very noticeable manner, for the better. The following weekend they were travelling, where he was in a gift shop and spotted some solid copper cups and shot glasses. He remembered the tea kettle, and picked up a few of the cups with the intent of seeing what effect they might have on his listening room. They worked, creating a more relaxed, spacious sound, with improved dynamics. He liked the effect so much he kept going, adding more cups, and then experimenting with copper wire. Bending the wire into shapes and placing it about the room.

I took this information and bought some of the hammered, solid copper cups myself. 4 shot glass sized cups and 2 of the 12 oz. tumblers. Figuring if it didn't pan out, I had some nice shot glasses and could make Moscow Mules for 2...

When the cups arrived, I placed the two larger cups at ear level, directly in front and behind my listening position within my room. There was a definite increase in image focus and more texture in the vocal ranges. I then placed 2 shot glasses on top of the stacked Stillpoints Apertures in the corners  behind my speakers. The remaining 2 shot glasses were placed at my sides, again at ear level. This brought a sense of air and spaciousness that also seemed to move the image into a space that now surrounded me. Dynamics and energy seemed to increase as well. Not a bad improvement for around $120.
Sertodo Copper cups. Available at Amazon. The shot glass is on the far left, followed by 2 12 oz. cups.

Further Experiments

Still it wasn't cheap, and I really didn't feel like filling my listening room with copper cups. I started thinking about alternatives, and experimenting. The easiest and cheapest solution was to use solid core copper wire. I bought several different gauges, 18,16, 14, 12, 10, 8 and 6 awg wire was ordered up, shaped into various sculpturesque shapes, and tested in my room. I learned that It doesn't take a whole lot to make a difference, and second you want to allow it to resonate freely in order for it to be it's most effective. Nearly all of the wire I tried with the exception of the 6 awg, added shrillness or brightness to the room. The 6 awg while tough to bend into shapes seemed to offer the best sound without becoming bright or shrill.

I experimented with shaping the 6awg wire into self supporting triangles, then setting them atop my corner placed Apertures, and positions off to the side of my chair, as well as behind. Even hanging off of the ceiling. It was interesting, and quite nice. With the right amount there was more depth, detail dynamics and the sound went from sitting at the front row of a concert to being on the stage, depending on where I placed the copper bits that were at my side walls. The image expansion seemed to depend on where the triangles at my side walls were placed.

Still curious, I ordered up some OFC copper rod from OnlineMetals.com. I started with the .1875" rods in 4 foot lengths. I cut up a cedar 4x4 fence post, sanded and finished it, then drilled holes in it to accomodate up to 4 rods. After much experimenting, I settled on this configuration as the best solution. I could shape the rods a bit to make them look a little more like sculptures, and less like some crazy project. I chose 2 rods for each base. Placing them in front, back and to the sides of my listening position.
Four .1875" x 4 foot long copper rods in an 18" long piece of cedar
4" x 4". I sculpted the rods by bending them around a steel pipe. It
gave them their wavy shape. 

Important things to note


  1. Copper seems to work the best. Brass, Bronze and steel were awful sounding in my room. Immediately shrill and unlistenable. Gold and Silver at those lengths and diameters was impractical.
  2. Larger diameter rod/wire seems to work best. 6 awg wire works and .1875" rod works well. I tried .3125" wire and it did seem to work on midrange frequencies well, but it was easy to get too much too fast. One rod max is enough in my opinion.
  3. The rods or cups need to be near the wall to work their best. They lose about 50% of their effectiveness if you move them a foot or more out from the wall. 
  4. Whether you use rods or cups, having them at ear level increases their effectiveness as well. With the 4 foot rods, it was no problem for the stands to be placed on the ground, with  the height of the rods extending to ear level and above.
  5. It's easy to overdo it. Too much and the sound becomes too hollow, bright or shrill. I would start with 4 to 8 copper rods and 4 wooden stands. 

Listening

As I said before, the copper offered up a pleasant, relaxed ease. It seemed to diffuse the electronic tension that was present. It also seemed to depressurize the sound in the room, making the walls less of an obstacle to the sound. My guess as to why is that the rods vibrate sympathetically to energy bouncing off of the walls, sort of mechanically dissipating that energy before it gets to your ears. That would explain the sense of ease, the room sounding larger than it physically is, and the need for the copper to be placed near walls. I also heard more clarity and detail, less smearing of the higher frequencies, and especially with the large cups, I heard more body and texture to the vocals. It was all very natural sounding.

This was in a system that was already using acoustic treatments and many tweaks, including Stein Harmonizers and Bybee Quantum Plugs. The copper still had a positive impact that was different from that of the Stein and Bybee. Not to mention that 8 copper rods and an 8' long 4" x 4" cost about $75.

Sure I could have made up a story about the exotic nature of the particular copper I was using, or how it was treated, or how the wood was an integral part of the process. I could have charged a small fortune for these room tuning devices, but for me it would be wrong to call it or make it anything more than what it was.

Try It Yourself. It's not expensive, and takes almost no time to put together.


Tuesday, October 4, 2016

Holy Sh*t Moments: Part 1

I have been in a creative mode lately. Lots of ideas have been born and tried. Some worked, others were learning experiences in what doesn't work.  I will quickly elaborate on two that have worked, producing "holy shit" moments that have me grinning from ear to ear, and don't cost too much.
The Bybee AC Module: Mine are specially wired with Furutech 12 AWG "nano wire". Yes you can buy them from Tweek Geek. We can also install them in Equi=Core balanced power conditioners for you as well.

Holy Sh*t Moment One

My first experiment involved installing a "special" Bybee AC module inside an Equi=Core 300. This would be powered by my new Dark Matter conditioner, then ultimately power my Auralic Aries streamer. So the chain of power goes like this:

Wall > Dark Matter Conditioner > Equi=Core with Bybee AC Module > Auralic Aries.

Even I will admit this seems like excessive power filtering and conditioning. There's no doubt to the normal person (which I am definitely not) this seems like crazy overkill.

The net result was stunning. So much more low level information, vocals were smoother, more textured and engaging, and the horns on my test track "Isn't This A Lovely Day" by Ella and Louis didn't want to rip my head off, even at ludicrous listening levels the horns sounded like...horns. Not tinny, metalic noisemakers trying to make my ears bleed. Muddy waters "My Home Is In The Delta" had superb vocal textures and the dynamics in his voice were un-believable.

Granted the combination of the Equi=Core and Bybee AC Module were just under $2000, the sound I was getting from the Aries was the best it had ever been.
The Core Power Technologies Equi=Core 300. Excellent on source components, preamps, and your music server.

Holy Sh*t Moment Two

So, thinking I have pretty much maxed out the power conditioning in my system, my thoughts turned to my server, and associated peripherals located in the adjacent room. It's no secret that PC's, powered external hard disks, routers, etc. are notoriously noisy beasts, so why not see what balanced power could do for the sound when powering networked servers and other bits.  I plugged a second Equi=Core into a Wireworld Matrix power strip, then proceeded to plug my server, the powered external hard disk, and the switch that is managing the network connection from the internet to my server and Aries.

This too was a step in the right direction. Not as jaw-dropping as the modded Equi=Core on my Aries, but again lower noise, more ultra low level detail emerging, and a less mechanical/electronic sound. The sound had more soul, more flow, less artificial tension in it.

Color me stunned.

My next post will cover a more "artistic" tweak I have discovered that, bang for the buck, I don't think can be topped. I am giving this DIY project away, as it is so simple I think it would be criminal to label it as something more exotic than what it is. Stay tuned...

Saturday, September 24, 2016

Review: Core Power Technologies Equi=Core 300


I have a lot of experience with power conditioning as it pertains to the audio system. Power cords, Power conditioning, Power supplies, and in-wall power. I've heard, expermented, tried, failed and succeeded at just about everything power as it relates to an audio system. Power is important. Wait, let me rephrase that, CLEAN power is important. It can make or break the performance of an audio component or system.

Enter Core Power

Core Power Technologies is a relatively new company making power cords with a balanced audio transformer wired in. A person can use them on a single component, or plug them into a power strip and use the balanced power to supply several components. They offer 5 models of their Equi=Core models, differentiated by the amount of power they can safely handle without limiting current. They make 50, 150, 300, 1200 and 1800 watt versions.

WTF is Balanced Power?

Our normal AC at the wall outlet consists of three "legs", hot, neutral, and ground. On the hot side,  +/- 120v of Alternating Current (AC) is presented, and it is said to possess 120 volts to ground.

Balanced power "splits" the 120v current into 60 volt legs. +60 on the hot and -60 on the neutral. There are still 120 volts present on the circuit, but it is now divided up, with the two AC legs being 180 degrees out of phase with one another.

With the 2 AC legs being out of phase, the noise riding the AC lines is cancelled out, but 120 volts are still delivered to your audio components. This is what makes balanced power such an effective noise reducing agent.

Watt?

To figure what components I could safely plug in to the Equi=Core 300 I had to consult the owner's manuals for the components I own. When they failed to mention wattage consumption, I looked at the value of the internal mains fuses (given in amps) and multiplied that times the voltage (120 volts).

  • Auralic Aries 120 volts x .5 amp = 60 watts peak (probably way less)
  • Auralic Taurus Pre 120 volts x 1 amp = 50 watts peak
  • Aqua Acoustic La Scala MKII 120 volts x 12.5 amp = 1500 watts peak (it uses tubes. Tubes in general consume more power)

Plugging In

So the Aqua La Scala was out, but I could use the 300 on the Aries and Taurus. I decided to allow the Equi=Core 300 to power both the preamp and my streamer via a Wireworld Matrix power strip. The Equi-Core would be working at about 1/3 of it's capacity, leaving lots of headroom in case it was needed. Headroom is always good.

Before we go any further, let me tell you what was filtering the power to my system. The same thing that has been filtering the power for 8 years, the Bybee Stealth. Nothing has displaced it as my ultimate reference. I can count only 2 other conditioners that came close, and they both cost much more. It was a totally unfair comparison with the Stealth costing over $6,000 and the Equi=Core costing only $899 as configured. But that is my measuring stick, and what I am intimitely familiar with.

I plugged the Equi=Core 300 to the wall, and connected the other end to a Wireworld Matrix power strip. The Matrix is a classic. Inexpensive and does no harm to the current being delivered through it. That made it perfect for connecting the Equi=Core to more than one component. The unit I received from Core Power Technologies was new, so I left the components on 24/7 for about a week before writing up my evaluation. That being said, straight out of the box the 300 made a noticeably quiet presentation.

Listening

I will get straight to the point. The $899 Equi=Core 300 was quiet, did not limit dynamics, and did not change the tonal characteristics of the music being reproduced. First the quiet, I expected this. Balanced power is quiet, but usually the transformers involved in this process can slow current delivery, or alter the tone of the music. None of this happened. Even with the added integral power cord, which is another item that can limit dynamics or change the tone. This thing was transparent, and able to easily deliver current to the Aries and Taurus.

This is important, because anti-power conditioning audiophiles lodge these 2 reasons as to why they go "straight in to the wall" more than anything. Many times their gripe is legit. Many power conditioners are fraught with a tradeoff. You can have clean mids and highs, but you will lose dynamic range. You will have a great midrange, but the highs may be rolled off. This did not happen with the Equi=Core. The Equi=Core impressed the heck out of me with it's tranparency. I expected the quiet, as I am familiar with balanced power. I did not expect this thing to be so darn transparent. The transparency is what makes the Equi-Core 300 such a killer value. Anything else I have heard in this price range either alters the tone or squashes dynamics. You usually have to pay A LOT more to get this kind of performance in a power conditioner.

Did the Equi=Core beat the Stealth? No, but it gave me 80% of what the Stealth does, and that to me is impressive for something that costs $899. I eventually plugged the Equi=Core into the Stealth at one point, allowing it to power the Taurus and Aries. The preamp and streamer were getting power from the Equi-Core, which was being fed power from the Bybee. What I got was an even blacker background than from the Stealth alone, with no sonic tradeoffs. Now if tradeoffs were going to show up, they would show up in this configuration. None, nothing. Just more quiet, and more music. Very impressive.

Conclusions

The Equi=Core 300 delivered clean, quiet power unlike anything I have heard in it's price range. This would not only benefit smaller, budget audio systems. It would be perfectly at home in very high performance audio systems. It could be used as a solo power conditioner, plugged into a power strip, or several could be used, each feeding individual components (within each Equi=Core's rated output of course).

If you've never tried power conditioning, try the Equi=Core. If you think you've got all the power condtioning you need, try the Equi=Core along with whatever  you are using. I think you will be pleasantly surprised at how much more you will be able to hear with it in your system.

Wednesday, September 14, 2016

Stillpoints Aperture: Acoustic Treatments Like Nothing Else

The Stillpoints Aperture in Walnut frame with black cloth

Acoustic Treatments like no other

The Stillpoints Aperture acoustic panels represent a whole new form of acoustical treatment. Each 22" h x 22" w x 3" d Aperture is actually three products in one: an absorber, a diffuser, and a resonator. They cover a broad frequency range as well, from 40Hz to well over 20 kHz.

Unconventional

According to Stillpoints, what makes the Apertures unique is their ability to continually adapt to the dynamic changes in the amplitude and frequency of the music. They say that Static, conventional acoustic treatments that offer one continuous level of absorption or diffusion may offer too much absorption at low levels and not enough at higher ones. The Stillpoints Apertures utilize a blend of absorption materials, and a unique design of internal chambers to trap acoustic energy. The diffusion portion of the Stillpoints Aperture breaks up the wave forms which will ad mid to high frequency absorption and reduction. The resonator portion offers control of the lower frequencies only when it's needed.

John Miller from Stillpoints was kind enough to send me several Apertures and stands in order to familiarize myself with their qualities, and to compare them to the plethora of acoustic treatments I already have in my listening room.

The Room

My listening area is located in a walkout basement. The immediate area where the speakers are located is 20' wide, which narrows to 15' from the left side after about 10', but then opens up on the right side to two doorways positions at roughly 45 degree angles with a stairway at the center. It then narrows to 14' for the remaining length of the room. The picture below leaves out the doors and stairs to the right, but you get the idea. It's a large, long room. It reproduces low bass really well, but has some issues with the midbass and lower midrange. This is due, I suspect to the little alcove adjacent to the left speaker.
The room minus the doorways and stairs, which are situated to the right,
and start where the area to the left begins to narrow.

The rooms and stairway to the right. This area starts exactly where
the room narrows to the left. If it were in the drawing above, it would
be located at the top.
Before the Apertures, I had spent quite a bit of time getting my listening space optimized. I had hung rails near the ceiling in the listening area and used these rails for hanging the acoustic treatments. It worked extremely well. I could swap out absorbers and diffusers, and could place them horizontally and vertically along the walls without leaving a bajillion holes behind. 
An early iteration of the room. Three GridFusors flanked by 2 Whisper
Wave absorbers and 2 bass traps. There are more treatments on
the side walls (not pictured), and the corner from hell is off to the left.
I also had hung 3 Sonex panels on the ceiling above the listening position to help with the slap echo from the wall behind the listening position, and to absorb some of the directly radiated sound. I like the Sonex on the ceiling for another reason. Should they become detached and fall they won't kill anyone since they are made of very lightweight foam.
The "cloud" located slightly in front of the listening position. Three Sonex
Whisper Wave panels hung on rails. It  creates a cool wave pattern,
and absorbs a lot of slap echo.

Let The Experiments Begin!

After spending several months getting familiar with my room treated with more conventional treatments (GIK GridFusors, Sonex Whisper Wave Absorbers, and Acoustic Geometry bass traps), I decided to begin experimenting with the Stillpoints Apertures.

The first Apertures I stacked vertically and centered them on the wall behind my speakers. They replaced a Sonex Whisper wave panel which won out over a GIK diffuser in that location.  With the Apertures in place, I felt the center image remained centered and depth had a little more clarity to it. What was shocking was I heard more detail, especially at lower listening levels.
The Two Apertures pictured are centered behind
the speakers. They are flanked by a Sonex
Absorber and, a GIK diffusor, and two Apertures
are placed in the corner.
I then added two more panels, one on each side and slightly in front of my listening position. These two Apertures had replaced the GridFusor diffusors. The soundstage remained wide, but was more focused with the Apertures. The GridFusors worked great in this location, especially for the money, but the Apertures just seemed to add more clarity, quiet and focus to the sound. Again I was hearing more low level detail, especially in the high frequencies.  The 4 Apertures as a whole seemed to help my speakers create a more balanced soundfield within the room.
Aperture at the side position, slightly in front of my
listening chair. Whisper Wave absorbers in the
background along the same wall.

Apertures & Bass

The most impressive feats of the Apertures were yet to come. I left the 4 Apetures up, and then I removed all of the bass traps in the room, 4 total. These were pretty massive, fairly expensive traps from Acoustic Geometry. They did the job fairly well (or so I thought) making the bass response in the room a bit flatter. I have an oddly shaped room that trapped lower midrange & midbass. Things could get quite boomy and congested with no traps, and I was made very aware of that fact after listening to the room once the traps were removed. Ugh.

I placed 2 Apertures in the corners nearest the speakers, 3 corners and 6 Apertures total. The Apertures seemed to exhibit a little better control of the resonant frequency than the bass traps, and the lows were magical. Not a term usually used to describe bass, but damn. It was controlled, balanced, fast, dynamic. It was lifelike. This was hard to believe just due to the smaller size of the Apertures compared to the Acoustic Geometry bass traps. The effect the Apertures had on the bass made it's way through the upper frequencies as well. Everything became faster, more dynamic and clearer. Even when the volume was at ridiculous levels, the sound stayed the same.
The corner from hell. This part of the room was off to the side of the left
speaker. It created a nasty resonance in the lower midrange and upper
bass. I had 3 Acoustic Geometry bass traps in the corners before I
placed the Apertures there. The Apertures worked miracles on the bass...

Summary

Here is what I liked about the Apertures: They quieted the room, made the entire frequency spectrum more balanced, spacious, dynamic and lifelike, and they were tiny in comparison to the conventional treatments. They were finished nicely as well. I forgot to mention that one can have art or photos printed on removable grills that can be inserted into the frame of the Aperture. This could give the Apertures a more artistic appearance in one's listening room. If done well, it might be hard for the average person to tell that they were indeed acoustic treatments. 
Stillpoints Aperture with artwork.

Due to budget constraints, the Apertures didn't completely eliminate my usage of conventional treatments. But my guess is they could. I will continue to experiment as time and funds permit.  Bruce Jacobs of Stillpoints will be dropping by in October as well to do a final tweaking of the room, but what I have so far allows my system to create the best sound it ever has. The apertures are not inexpensive, but a few go a long way. The nice thing is you can start with one or two, and build from there.


Wednesday, August 31, 2016

Entreq Everest & K2: A perspective


The US distributor for Entreq recently sent me the new accessories for their fabulous line of grounding boxes. The Entreq grounding boxes and cables were eye opening to experience in my own system. More blackness between the notes, less noise, more texture to instruments and voices, and just a more musical presentation are but a few of the attributes of these products when set up on the right components. The Entreq Everest & K2  ($249 for the K2, $349 for the Everest) they sent were add-ons to the existing models of grounding boxes, and meant to improve performance. I was very interested in giving these items a try.

From the Entreq Web site:

"When we at Entreq found a massive new breakthrough for our metal/mineral mix, used within the Ground boxes... we accepted the challenge to find a solution where all the benefits from our new discoveries could be incorporated & applied to all existing Ground boxes and work, without limits, with our wide range of Eartha cables.
The demand was it should work from our entry level Minimus/Tellus all the way to the Olympus Tellus. Working as effectively with the entry level Eartha Copper cables as with Eartha Atlantis. It should also be easy to handle and easy to attach. This has truly been a challenge for us!"
As far as using the product they state: 
"You simply replace the wood caps on your existing ground box with either the K2 or Everest product."
Looks
The Everest and K2 had identically sized and shaped wooden housings, although it seemed my K2 has a little "extra" sanding along the tip of the edge where the post came out, so they appeared slightly more rounded. I chalk that up to variances in production.  The physical difference between the two lie in the length of the post that stuck out of them, with the post on the Everest sticking out about 1cm further than that of the K2. It was threaded internally so as to replace the wooden caps that secure the Entreq Eartha cables to the ground boxes. It appeared to be made out of aluminum or (my guess) magnesium. There didn't appear to be any powder or mixture of materials encased in the housing, but I could be wrong. It appeared to be the post and the wooden housing only.

The results according to Entreq:
MinimUs: Single Ground post only - The replacement of a K2 or Everest to a Minimus will then allow it to, at least, out perform a standard Silver Minimus! Tellus: Three Ground posts -  As above the replacement of the K2 or Everest on a Tellus will offer a performance level higher than a Silver Tellus.
Silver Tellus: Again the K2 or Everest applied to a Silver Tellus will start to approach the performance of the mighty OlympUs! 
My System
For evaluating the Everest and K2, I had the following gear in my system:

  • Tweek Geek BMF loudspeakers - 98dB efficient, 4 12" side firing powered subs, 12" front firing Faital pro midbass, Beyma TP-150H horn loaded AMT HF driver crossed at about 1100Hz. Very revealing, very dynamic, easy to drive and monstrous full range output if needed.
  • AcousticImagery Atsah 1200 monoblock amps - 1200 watts into 2 ohms, 140dB signal to noise, Hypex Ncore based amps. They idle along most of the time due to the sensitivity of the speakers.
  • AcousticImagery Jay-Sho fully balanced autoformer based passive preamp - adds NOTHING to the signal. A gorgeous pre.
  • Auralic Aries streamer with femto clock
  • Aqua Hifi La Scala MKII DAC - DFD (Direct From Digital) decoding without any digital filter. In addition it also utilizes a single-stage signal amplifier: VALVE / MOSFET direct-coupled and LED bias. It uses ECC81 tubes - a High-Frequency triode - for its low noise main feature. This is directly connected to a High-Voltage MOSFET output.
  • Dark Matter Power Conditioner - Successor to the Bybee Stealth (only the prototype exists right now)
  • Audience AU 24 SX Speaker cables & balanced interconnects.
  • Stillpoints Aperture Room Treatments
  • GIK Acoustics GridFusors diffusors
  • Sonex Whisper Wave absorbers

The Grounding Boxes
I had an Olympus Minimus and a Silver Minimus on which to try the new products. The cables I had on hand were RCA terminated Apollo and Silver Eartha cables. I used the same type of setup for each combination. The grounding boxes were connected to the preamp's signal ground for all tests. This was the most effective and revealing placement for the ground boxes in my system.

This is a very limited set of grounding boxes, cables and their applications, and by no means a comprehensive analysis. But it should supply some insights into the sonic effects of the Everest and K2 on the Olympus and Silver minimus with Apollo and Silver Eartha cables.


The Difficulty in Evaluating Entreq
Evaluating the Entreq Everest and K2 required a different procedure than normal. they needed time to "settle in" after installation. This means putting them on the grouding box, waiting a few hours to have serious listening time, listening, then removing the devices and to hear the effect their absence has on the system. It takes a lot of time and patience. This made the entire reviewing process take se

The Playlist

  • Ray Brown Trio - The Real Blues (Soular Energy)
    This is a live recording in a small venue with acoustic bass, and lots going on in the background. It's great for listening to bass and low level detail.
  • Chris Jones - No Sanctuary Here (Roadhouses & Automobiles)
    This has a powerful bass track, acoustic guitar, Chris's voice is close mic'd, and the background vocals are recorded in a somewhat reverberant space that when played back right one really gets a sense of that space. Chris's voice is a great test of upper bass and can sound boxy if something is off.
  • TrentMoller - Evil Dub (The Last Resort)
    Recorded in Q Sound, this track has great electronic bass, quick pulsating cymbals where you can hear each strike and the emphasis on certain strikes, and a real holographic sound. You can hear things behind you, spinning around you, and the sound goes from narrow to filling the entire space. Clarity in the cymbals, bass, and holographic imaging are what I am listening for here.
  • Phil Collins - I Don't Care Any More (No Jacket Required)
    It's all about the dynamics of the drums on this recording. Something my system does particularly well. At the right volume level it is goosebump inducing when things are "right" with the system.
  • Ella Fitzgerald and Louis Armstrong - Isn't This A Lovely Day (Ella and Louis)
    Great male and female vocals. Ella's voice can sound a little boxy if things aren't quite right.


Observations


Olympus + Everest:  I  put the Everest on the Olympus and let it settle in over night. The next day, I was able to hear the difference, and it was significant. The whole frequency spectrum seemed to gain more energy and push forward. The soundstage was wider and deeper, but when it moved forward into my listening space it seemed to add a sense of tension, not the relaxation that I prefer.

 I didn't care for the Everest-Apollo-Olympus Minimus combo with my system. Replacing the Everest with the wooden knob on my Olympus Minimus immediately restored a more relaxed musical presentation that was more pleasing to my ears.

I could see the Everest-Apollo-Olympus Minimus combo working well with  a tube based system or one that had a more subdued mid-high frequency response. It was too much of a good thing for my system however.

Olympus Minimus + K2 - The K2 sounded about half as powerful as the Everest, and way more agreeable in my system. I preferred this combination to the Everest, but still preferred the stock knob after prolonged listening. Here's why: I listen to a lot of different styles of music, and like my system to be able to accomodate all of them. It's a compromise I make for every day listening. The K2 allowed really good recordings to sound incredible, but poorer recordings were unbearable. The combination was not at all kind to compressed, and thin rock recordings. Streaming music suffered as well, as all of the compression artifacts were laid bare.

I could see myself using the K2 + Apollo cable + Olympus Minimus during equipment and recording evaluations, or if I really want to hear all of a great recording. The entire audible range had a clarity that was natural, rich, full of texture, detail and musically natural. If you have a library of superb recordings, and want to hear everything in them, this combination is definitely worth auditioning.

Silver minimus + Everest: This took that speed and clarity of the Silver Minimus and Silver Eartha down into the lower frequencies. It was as if the rise and decay of the music was less encumbered by noise. Rises and transients were more dynamic, sharper and not smeared. Decays just went on and on. The Everest would be a very nice and inexpensive upgrade for Silver Minimus owners.

Silver Minimus + K2: I was super impressed with this combination. It approached the Olympus in terms of tone, detail, texture and dynamics. If I hadn't heard the Olympus Minimus in my system, I would be totally happy with the Silver Minimus and K2 combination. It widened the soundstage and gave the midrange a very nice character. Bass definition was clearer as well. Again the transients and decays were more dynamic and sharper, but perhaps not quite what the Everest offered. In terms of bang for the buck I think this combination was the best.

Conclusions

This exercise really shows how important it is to hear something in your own system before buying. We as audiophiles often jump to the conclusion that the most expensive product will sound better. In this situation I assumed that the Olympus Minimus with the Apollo Cable and Everest knob would be the ultimate combination. Not so. The most satisfying combination turned out to be the stock Olympus Minimus with the Apollo cable. The next best turned out to be the Silver Minimus with the Everest and Silver Eartha cable. The best value turned out to be the Silver Minimus with the K2 and Silver Eartha cable. The Silver Eartha was substantially upgraded by the addition of either the K2 or the Everest. My advice if you are a Silver Minimus owner: Try them both. If you are looking to dip your toes into the grounding box waters, start with a Silver Minimus and Eartha Cable, then add a K2 or Everest knob at a later date.

The great news is, you can try any of these combinations on your own system and know what works before you spend your money.

Wednesday, August 17, 2016

Sometimes You Know Immediately... Review of High Fidelity's CT-1 Ultimate XLR Interconnects.

I had a customer order a pair of the new High Fidelity CT-1 Ultimate XLR interconnects recently, and before I delivered them, I had the opportunity to audition them in my own system.

Rick Schultz, owner of HFC and idea man behind their patented magnetic conduction technology, took more than a year to perfect the balanced version of his interconnects. The trick was getting the magnetic wave stabilizers to be powerful enough and small enough to fit inside a custom made balanced connector.  He finally perfected the design earlier this year and recently moved the balanced cables into production. Rick told me "The performance is beyond my expectations".

The 20lb. (!) package from High Fidelity Cables arrived the other day with 2 sets of one meter interconnects, each in it's own foam lined Pelican style hard case. The cables themselves were substantial, mostly because of the two magnetic wave stabilizers that were situated in the middle of each cable.
Pictured above: The Magnetic Wave Stabilizer that resides in the center of the CT-1 Ultimate balanced interconnect.

The connectors themselves were slightly larger than standard balanced connectors, but not heavy like the wave stabilizers. They should not interfere with standard spaced balanced input or output connectors.
The custom made connectors for the CT-1 Ultimate interconnects took over a year to develop.

A Word To The Wise

When ordering a set of these, be sure to account for the center placed wave stabilizers. There is a 99% chance that they will need to rest on something, or you risk damaging the connectors, or pulling your gear off of it's position. Be that on a shelf, on cones, whatever, the wave stabilizers are heavy enough to warrant their own space on a shelf. It would probably be best to order a long enough run to allow you some flexibility. A more budget conscious approach may be to simply move your components closer together...

Fortunately my components sit on one long bench-like table that sits very low to the ground. I have my components fairly close together, and the shelf is low enough to the ground that the wave stabilizers sat close to the floor, propped up by some Agora Acoustics MagicHexas.

Agora Acoustics MagicHexas. 
I've been on a bit of a minimalist kick with my audio system lately. I had only three components in the signal chain at the time of this review. A Lumin S1 music streamer which served as the source, DAC and preamp, connected to a pair of Acoustic Imagery Atsah 1200 monoblock amplifiers. There is a purity in simplicity that is more difficult (and expensive) to achieve with a more elaborate setup. The tradeoffs in this case being the removal of a component (preamp), and additional cables vs. the volume control on the Lumin being "lossy". Listening to both led me to choose the less component, lossy volume control combo. Fewer components & connections equalled less signal loss in this instance. This combination has allowed me to evaluate subtle changes I make to my system very, very well.

For additional tweaks not in the signal path, I had the Lumin connected to an Entreq Olympus ground box, and also had an Entreq Silver Minimus connected to the dedicated circuit's ground.  I also have the Stein Harmonizer system (2) with Blue Suns, and last the Bybee Quantum Plugs.

Other cables in the system were the Audience AU24 SX speaker cables ( perhaps the best value in audio cables today) and the power cables were a new Tweek Geek product that has yet to be named or released, but definitely up to the task of letting the music through.

Sometimes It Takes Only A Second

As soon as I inserted the High Fidelity Ultimates, I knew they were worth the asking price. The room felt as if it had just doubled in size, and the speakers disappeared, leaving a very wide, tall, deep and convincing soundstage. Balance was exquisite, and the bandwidth was extremely wide. There was deep, tuneful and thunderous bass emanating from the 4-12 inch powered subwoofers like I hadn't heard before, and the midrage had such detail and texture, again a first for my ears. The highs did not disappoint either. They had extension, clarity and ease. In fact the whole musical presentation had relaxed and decompressed from the room. The music was now in it's own space/time continuum. Spooky in a very good way.

Yes, all of that was extremely good, the best I have heard. But I have had other cables in my system come close enough to this type of performance to challenge the asking price of the High Fidelity's. What convinced me beyond a doubt that the CT-1 Ultimate cables were the best was the imaging magic that they performed. Many cables can throw a wide soundstage, but what usually is compromised is image placement and specificity. They trade focus for a wide, enveloping soundstage. The High Fidelity Ultimates did not. They maintained the image focus, and extremely good placement while creating one of the widest, most enveloping soundstages I have ever heard.

This tells me two things. The High Fidelity Ultimate XLR cables have a very low noise floor, and very good phase coherancy. 

Cables That Cost More Than The Components?

At this point I decided to try something a little unorthodox. I swapped the moderately expensive source and amps I had been using for much less expensive ones. I inserted the Lumin D1 Streamer/DAC/Pre ($2450 with Sbooster power supply) in place of the S1, and replaced the AcousticImagery Atsah 1200 amps ($9995 MSRP/Pair) for the Atsah 500's that retail for $2000 per pair. So less than $5000 in source and amplification cost, connected via a $7800 interconnect. 

Sonically, with this combination I lost a bit of texture and resolution, but I could live with that. I still had the ease, the soundstage, the imaging, along with more resolution than I had ever heard coming out of these budget components ever before. All for about the MSRP of the Lumin S1. 

This experiment turns the standard protocol for buying a system on it's head and begs the question, are we really getting the most out of our electronics when a relatively inexpensive audio system using uber expensive cable can produce sound equivalent in listener satisfaction than a system with expensive components using moderately priced cables?

What it proved to me and my ears is that there are more ways to audio nirvana than one typically thinks.

Conclusion

To my ears, and in my system, the High Fidelity XLR interconnects, specifically the CT-1 Ultimates, are the cables to beat for those looking for the absolute best listening experience regardless of price. There were absolutely no shortcomings. They did everything right, and did it like no other cable I have ever heard before. I could just sit, listen, relax and lose myself in the music. That is worth quite a lot to me, because I know all too well that when my audio system doesn't sound right, my whole world is affected. Music is my therapy, my catharsis, my escape. It makes me a bit of a freak, I know, but that is my reality. I need music, and I need really good sound in order to relax fully and get the "therapy" I need. What is that worth to me?  It is worth having these cables. These are a component, no doubt. They had that much of a positive impact on my listening experience. Can one come close to the performance of the CT-1 Ultimate for less? Probably, I can think of a few cables that come close, do cost less and could give one 80% of the satisfaction that the High Fidelity Cables deliver. But for those looking for the best listening experience, the CT-1 Ultimates will not disappoint, and definitely cost less than component upgrades, tweaks and a therapist.